About me

I have been making fabric crafts since the 70s, started hand piecing and quilting in the 80s, and have been machine piecing for the last seven years. My pile of UFO tops are slowly diminishing with the help of my longarm quilting machine, an Ansley 26.

Saturday, September 3, 2011

BQ 2 with a panel


Love the BQ2 pattern and I wanted to try something different. I took a panel of French Ladies from Loralie Designs and cut them out of the panel. The block for the BQ2 measures 9 1/2" but the French Ladies measure less. So, because the blocks aren't square on the panel, I added hot pink strips measuring 1 1/2" on the sides and 2" strips on the top and bottom. Using my 9 1/2" ruler I squared up the wonky blocks making an uneven sashing. I added pink with black dots that I was saving for another quilt (but had never made.... LOL) and a black swirl that was leftover backing from another quilt to finish out the pattern. My plan is only to make 12 blocks (unless I change my mind), so there will be 3 squares leftover, maybe potholders or something else.

Wednesday, August 31, 2011

Spicy Spiral Table Runner


I have had the Spicy Spiral Table Runner pattern and 9 degree ruler for many years. It is sooooo fun. It goes together with only 8 fat quarters OR 8 one-fourth yards. You start with cutting each fabric a different width according to the pattern chart, assembling 4 identical strip sets, and cutting wedges of different lengths. The wedges are assembled from smallest to largest from two colorways to make this lovely tablerunner. I see many of these in my future.


I will be teaching this class at Calico Mermaid on Weds., Sept. 7th.

Tuesday, August 23, 2011

Summer Months WEEK 2


Week two saw me back at the Central Coast for four days with six of my teacher friends to honor a friend who had just earned her doctrate after 2 long years of study from USC. We traveled in three cars, stopped at a winery that had great balsamic vinegar, and ate lunch in Morro Bay with a view of Morro Rock and the ocean. We stayed in another friend's rental home in Grover Beach that sleeps 14, so there was privacy as well as great comradery. Half the grouped hiked up a trail at Montana de Oro, while three of us (one was me) sat at the beach and enjoyed a picnic. When we met up again we all walked the flat trail along the shoreline. Great trip for all and now we are hoping to make this an annual event. Lots of ideas floating around for next year's trip.


No quilt shopping for me but in the evening I worked on an applique piece as we set around and visited and played games. I had taken a freezer paper technique applique class at Totally Tina's in Porterville and was trying very hard to complete the hand sewn piece. (I am such a machine-applique girl.) I used scraps from my stash and the border is a batik. I quilted around the hand sewn applique using a free-motion badger blossom throughout the piece. Cute pattern.

Summer Months

Wow! Time has flown by...summer has come and gone...school has begun...and I am currently off work (after the first week of a new school year) due to a foot infection.
But let me degress and tell you of my summer months - best quilting summer ever!
The first week of vacation myself and three friends participated in the Central Coast Shop Hop, 11 stores with food, prizes, and fabric. We stayed at the Holiday Inn Express in Grover Beach (free breakfast and coffee) and traveled as far south as Ventura and started in Paso Robles. We added a few of our favorite stores, love Creation Station in Buellton, so I believe our final count was 19 stores in three days. Yes, we were tired but each store was so unique. This shop hop features a complete quilt pattern from each store on the hop and this year, they were available online in advance of the hop so you could concetrate on your selections. Here is a link to the patterns: http://www.quiltshopsofthecentralcoast.com
Two stores were closing down, The Treasure Hunt in Carpenteria and The Fabric Quarter in Goleta, both awesome stores that will be missed, so there were some great bargains to be had.
I won one of the baskets (a styrofoam ice chest) filled with fabrics, books, patterns, and notions. First time ever!

Sunday, May 29, 2011

Heart of the Valley Shop Hop 2010


Monday evenings, three friends and I have been working on the blocks from last year's shop hop. Finally finished all the blocks, put them on point, and made my first ever scalloped border. My mother-in-law likes to put binding on by hand so she added the finishing touches. Definitely a gem. Finished size 80 X 80.

Sunday, May 8, 2011

Catching up for April


I am so sorry I missed posting in April. I have been busy quilting and will catch everything up over the next few days.


Two pics to show tonite: My April Hole in the Barn and my Guild theme quilt.


My April Hole in the Barn is a 12.5" block with a 6.5 inch star center.


My theme center now measures 33.75" square. I love the scrappy golds.


I finished my red, white, and blue Central Valley Shop Hop quilt with my first ever scalloped edge. Picture to follow later this week.

Sunday, March 27, 2011

HGTV Hole in the Barn


I am participating in an HGTV BOM with stars (6.5 in) in the center of The Hole in the Barn blocks. I chose fabric that I picked up at last year's Coastal Shop Hop. I think they are coming out pretty good. Here are blocks for January, February, and March.

March Happenings


Wow! Where has the month gone. Finished the top for my Wash Tub Girls. Will post a pic when it is quilted.

I have taken on the challenge of the theme quilt at my guild. We are using the pattern "Bon Voyage" by Laundry Basket Quilts. We are creating this quilt in rounds over 6 months. The center is due this month. The pattern calls for applique but I chose to use two of Carol Doak's patterns from 50 Fabulous Paper-pieced Stars. I have a collection of golds, browns, and blacks that I decided to use for this scrappy quilt. Here is my center block.

Saturday, February 12, 2011

Designing quilt for Wash Tub panel


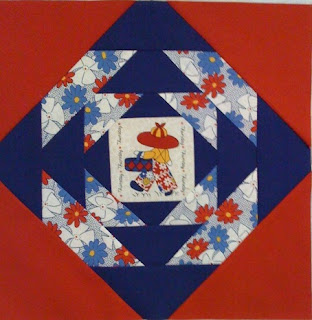
I mentioned before that I have some friends that I quilt with once a week. We are currently working on a panel that I purchased several years ago (yes, I purchased several). There are two color ways in the panel, the blue and red which I am using and a purple and yellow which all the ladies wanted (but only two were given). The top is consisting of two blocks with the printed motif in the center. The first block is a pineapple block made with squares of fabric (very fun and easy) finishing 11" and the second block, Morning Star 2, finishing 12", I took from http://www.quilterscache.com/ I am using 4 kona solids: a yellow, dark blue, light blue, and a red and 8 - 30's prints. All of our blocks are to be finished by Friday the 18th when we will put the top together. I hope to share pictures of the top before the end of the month.

Thursday, February 10, 2011

Charm Pack Tote


Wow, my days are flying by and I have not been posting my work. I finished a tote I started for my "artsy" sister and want to share the link. This is nice and large and will be perfect for her to carry her student's art homework back and forth to class. My sister is an instructor at FIDM. I made the bag with brights and geometrics to add color to her day. Hope she likes it!

Below is the link. The pattern is very well written.


http://buttonberry.typepad.com/photos/charm_pack_tote/charmtote_pattern_image_final.htm

Friday, January 7, 2011

Disappearing 4 patch


Have you tried the disappearing four patch yet. It is all in the cut and twist. Check it out.

Twister wreath


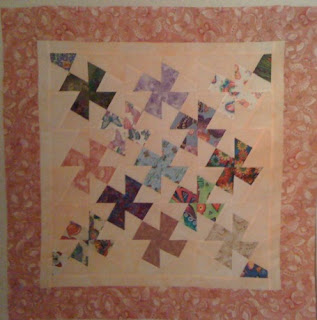
Here is the lil Twister Wreath. Layout is 25 squares with 5 white squares forming a cross in the center prior to cutting.

I was going to make these for Christmas gifts but since I only had one week to make 7 gifts I decided I would be the only one receiving this ! :)

Additional Twister


I made a second lil twister as I had another 13 blocks still to use. This time I put colored squares that read as tone on tones between the butterfly squares. I did not use the corner blocks so there are no partial pieces in the corners.


This one looks more like an Escher puzzle.

Sunday, January 2, 2011

Lil twister


Well, there were scraps of butterfly fabric left and I couldn't throw anything away. So I cut the leftovers into 4.5" squares and started the process again. Except I made some changes in my layout from the first quilt top.

I had enough leftovers to make two wallhangings. I took 13 squares and added squares of a hand dyed batik between each butterfly square. Next, I added a batik border and started to cut up my fabric using my rotary cutter and the Lil Twister ruler. I found it challenging to cut around the smaller ruler with my cutter and instead, using a sharpened pencil, traced around my squares with the pencil, and then cut out the squares, some areas with the rotary cutter and some with scissors. The finished product went together much faster this way.

The border took longer for me to figure out then the piecing! I loved the more open looking tesselations on this one.

The Twister


I guess I haven't talked about how much I like the "twister". This quilt design goes right to a math teacher's heart...tesselations...M.C. Escher Ask my students...They all know his work.


You pick a square size (I first started with 10"...I have a pile of butterfly fat quarters and they cut up nicely into layer cakes) Use spray sizing and iron seams so that each row has seams going a different direction. That way they will nestle well together and corners will match. Piece them together in rows until you get a size you like. Add a border all around...mine was aboout 3.5". Then the fun part.


Take your quilt, lay the "twister" ruler (I purchased mine from http://www.quiltpatchlane.com/ )in the the upper left corner, matching seams with lines on ruler and keeping the "cs" in the lower right of the square. Cut around the square with your rotary cutter carefully. Keep working straight across, moving the ruler to the right, matching seams to the lines on the ruler. I found that as I cut each square I would reposition them on my design wall. Resew new squares being careful of the bias edges and the directions you are ironing your seams. Add borders as you desire.


Here is the picture of my first completed Twister top for 2011.